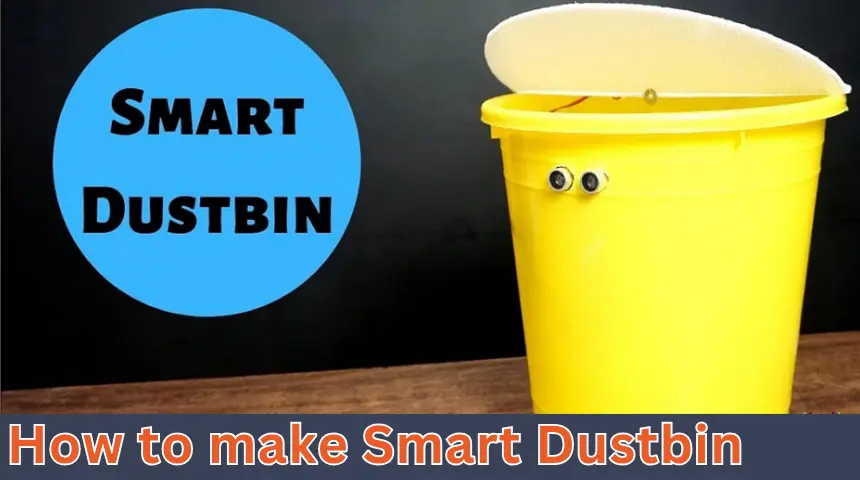
How to Make a Smart Dustbin Using Arduino Uno, Servo Motor and an Ultrasonic Sensor
Introduction
In this tutorial, we will learn how to make a smart dustbin using Arduino Uno, Servo motor and an ultrasonic sensor. This project introduces a touchless solution for waste disposal, which is particularly useful in maintaining hygiene during the COVID-19 era and beyond.
Hardware Required
- Arduino Uno
- Ultrasonic Sensor HC-SR04
- SG-90 Micro Servo Motor
- Dustbin
- Full Kit
Software Required
- Arduino IDE
Component Details
- Arduino Uno
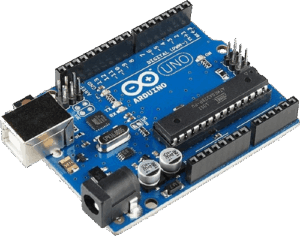
Arduino Uno is an open-source microcontroller board based on the ATmega328P processor. Key features include:
- 14 digital input/output pins, 6 of which support PWM output
- 6 analog inputs
- USB connection, power jack, ICSP header, and reset button
It is economical and ideal for beginner-level projects, allowing users to experiment freely without worry.
- Ultrasonic Sensor HC-SR04
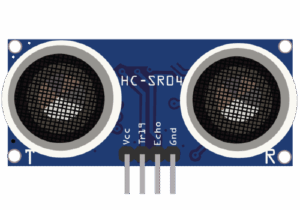
The HC-SR04 sensor measures distance using SONAR principles.
- Components: Transmitter (emits ultrasound) and Receiver (listens for echo)
- Applications: Obstacle avoidance, distance measurement
- Working Principle: Emits an ultrasonic wave that bounces back after hitting an object. The time taken for the wave’s return determines the distance.
- SG90 Micro Servo Motor
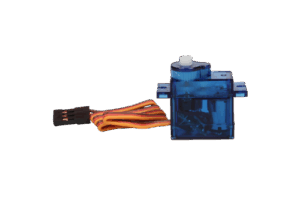
The SG90 is a lightweight, fast, and reliable servo motor, commonly used in:
- Remote-controlled vehicles (cars, boats, planes)
- Robotics projects
It operates smoothly with most radio control systems and provides precise motion for the dustbin lid.
Working Concept
The smart dustbin automates the process of opening the lid when an object is detected. Here’s how it works:
- Detection: The ultrasonic sensor HC-SR04 detects an object in front of the dustbin.
- Signal Processing: The sensor sends data to the Arduino Uno, which processes the signal.
- Actuation: The Arduino signals the servo motor to open the dustbin lid for a specified time (default: 3 seconds).
This project provides a contactless solution, making trash disposal more hygienic and efficient.
Circuit Diagram
Main components
- Arduino Uno
- Ultrasonic Sensor HC-SR04
- SG90 Servo Motor
Connections:
- HC-SR04:
- Trig → Pin 5
- Echo → Pin 6
- VCC → 5V
- GND → GND
- Servo Motor:
- Signal → Pin 7
- VCC → 3.3V
- GND → GND
- Power Supply:
- A 9V battery is connected to the VIN pin on Arduino Uno, with grounds connected together.
Program Code
Here’s the code for the smart dustbin. Upload it to the Arduino Uno using the Arduino IDE.
#include <Servo.h> // Servo library
Servo servo;
int trigPin = 5;
int echoPin = 6;
int servoPin = 7;
int led = 10;
long duration, dist, average;
long aver[3]; // Array for averaging distance measurements
void setup() {
Serial.begin(9600);
servo.attach(servoPin);
pinMode(trigPin, OUTPUT);
pinMode(echoPin, INPUT);
servo.write(0); // Close the lid on startup
delay(100);
servo.detach();
}
void measure() {
digitalWrite(led, HIGH);
digitalWrite(trigPin, LOW);
delayMicroseconds(5);
digitalWrite(trigPin, HIGH);
delayMicroseconds(15);
digitalWrite(trigPin, LOW);
duration = pulseIn(echoPin, HIGH);
dist = (duration / 2) / 29.1; // Calculate distance
}
void loop() {
for (int i = 0; i <= 2; i++) { // Average distance calculation
measure();
aver[i] = dist;
delay(10);
}
dist = (aver[0] + aver[1] + aver[2]) / 3;
if (dist < 50) { // Change threshold distance as needed
servo.attach(servoPin);
delay(1);
servo.write(0); // Open the lid
delay(3000); // Keep it open for 3 seconds
servo.write(150); // Close the lid
delay(1000);
servo.detach();
}
Serial.print(dist);
}
Final Assembly
- Attach the Arduino Uno and the 9V battery to the dustbin wall using double-sided tape.
- Upload the code to the Arduino board via the Arduino IDE.
- Power on your setup, and your smart dustbin is ready to use!
Conclusion
With this smart dustbin, you have created a hygienic and contactless solution for waste disposal. Experiment further by customizing the code to adjust lid timings or sensor sensitivity. Enjoy building!